How to use Binance: Ultimate beginner’s guide series

So, you have finally made up your mind to invest in cryptocurrencies. Well, congratulations!
I bet the next questions in your mind are how to buy digital assets, the best exchange to use, and how to trade. In this tutorial, I’ll teach you all you need to know about how to use Binance exchange. From how to sign up to how to secure your account, trade, the trading fees associated with the exchange, and of course some comparison with other exchanges.
Be rest assured, by the time you are done with this ultimate guide, you’ll know all about how to use Binance.
That being said, let’s quickly run through the history of Binance.
What is Binance and when was Binance founded?
Binance is the brainchild of Changpeng Zhao and Yi He. The duo were workers at OKCoin exchange. In 2017, they decided to build their own crypto exchange. Following a $15 million ICO fundraising round that lasted for just 20 days, Binance launched in July 2017. Binance sold 100 million pre-created BNB tokens during the ICO.
Fun fact: An initial coin offering, otherwise known as an ICO, is a quick and easy way for crypto-based businesses to raise funds without having to deal with regulatory hurdles. ICOs are quite similar to Initial Product Offerings (IPOs). ICOs became quite popular in 2017 and 2018. Sadly, many of them turned out to the scams.
World’s largest cryptocurrency exchange
Surprisingly, although Binance was not the first exchange, it became the world’s largest cryptocurrency exchange by trading volume in less than eight months after going live. The company has since expanded its offering to include many products, including Binance Academy, Charity, Cloud, DEX, and Launchpad, just to mention a few.
As I said earlier, Binance is not the first exchange, neither is it the last. Before Binance, there were other exchanges such as Kraken, Gemini, and even Coinbase.
Coinbase was founded in June 2012 and claims to have more than 35 million users worldwide.
How to register on Binance
It’s a no-brainer that before you start trading on Binance, you must have created an account with the exchange. Follow the simple instructions below to open an account.
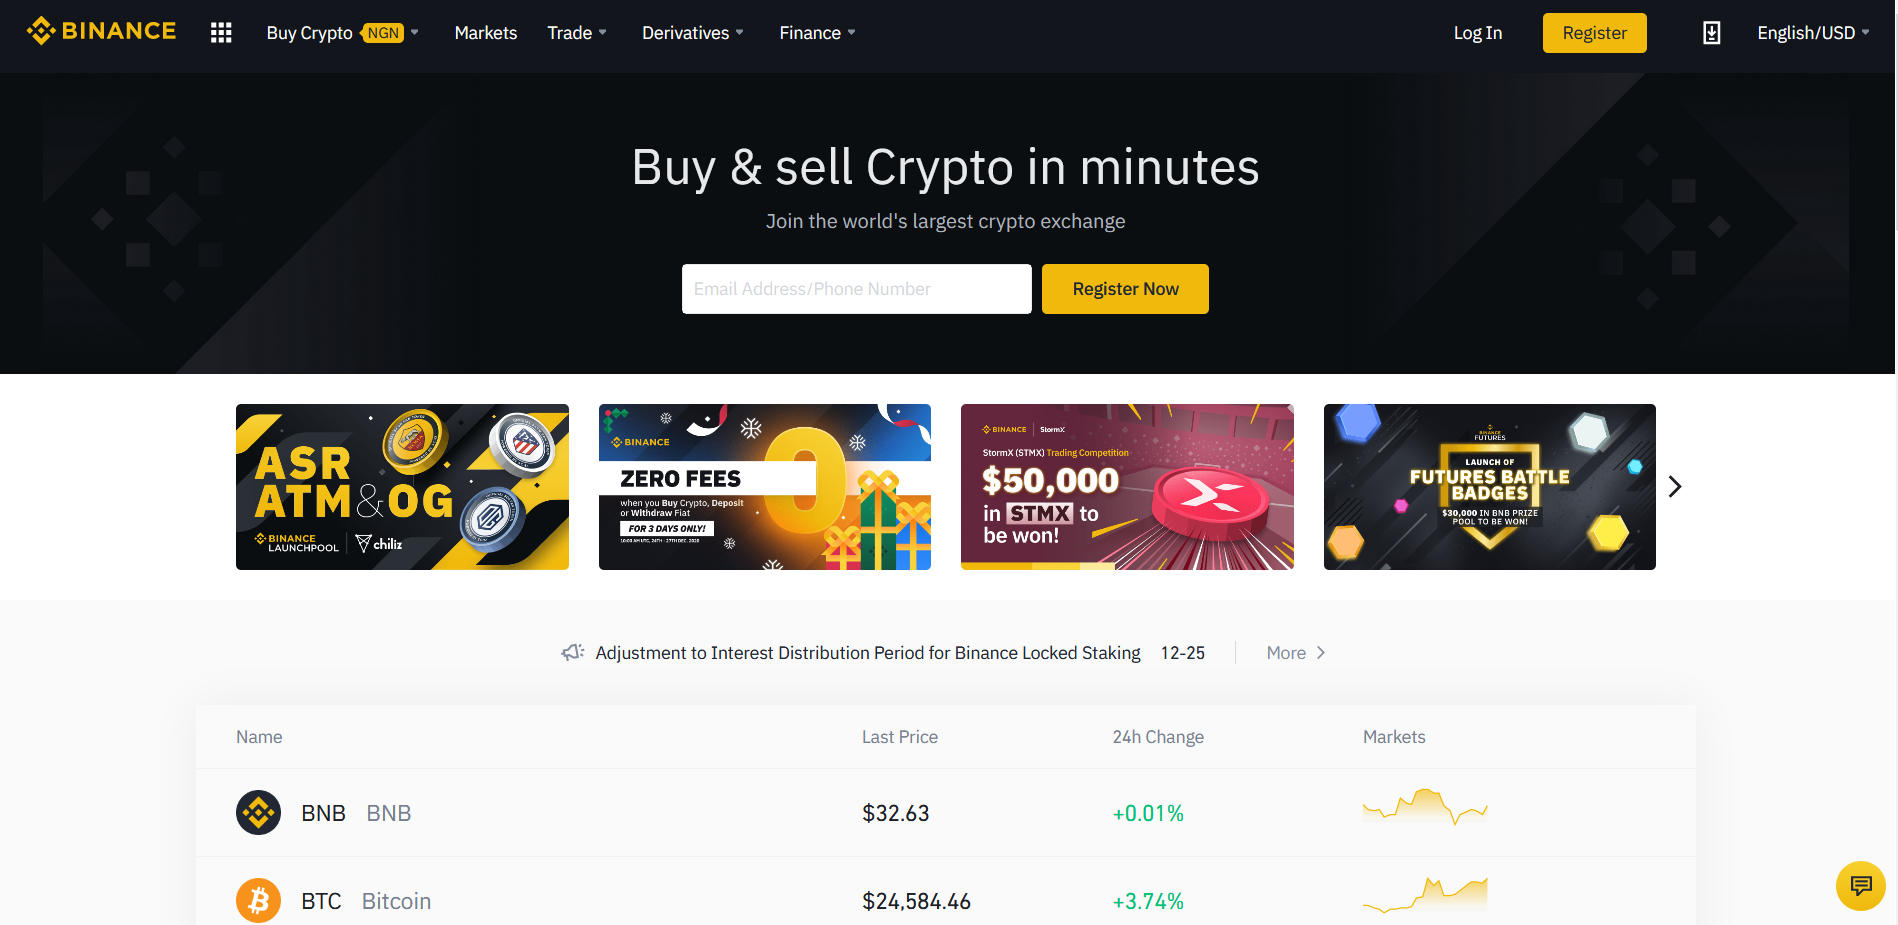
- Head over to the Binance website and click on “Register” from the dashboard.
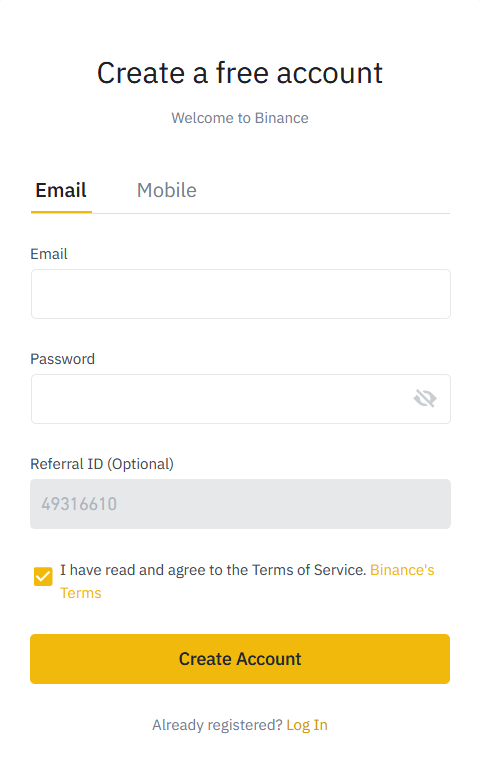
2. You will be redirected to a page where you will need to enter your email address and create a password. There is also an option to use your mobile number.
3. Input your email address or phone number and password, and then agreed to Binance’s Terms of Service. Next, click the Register button.
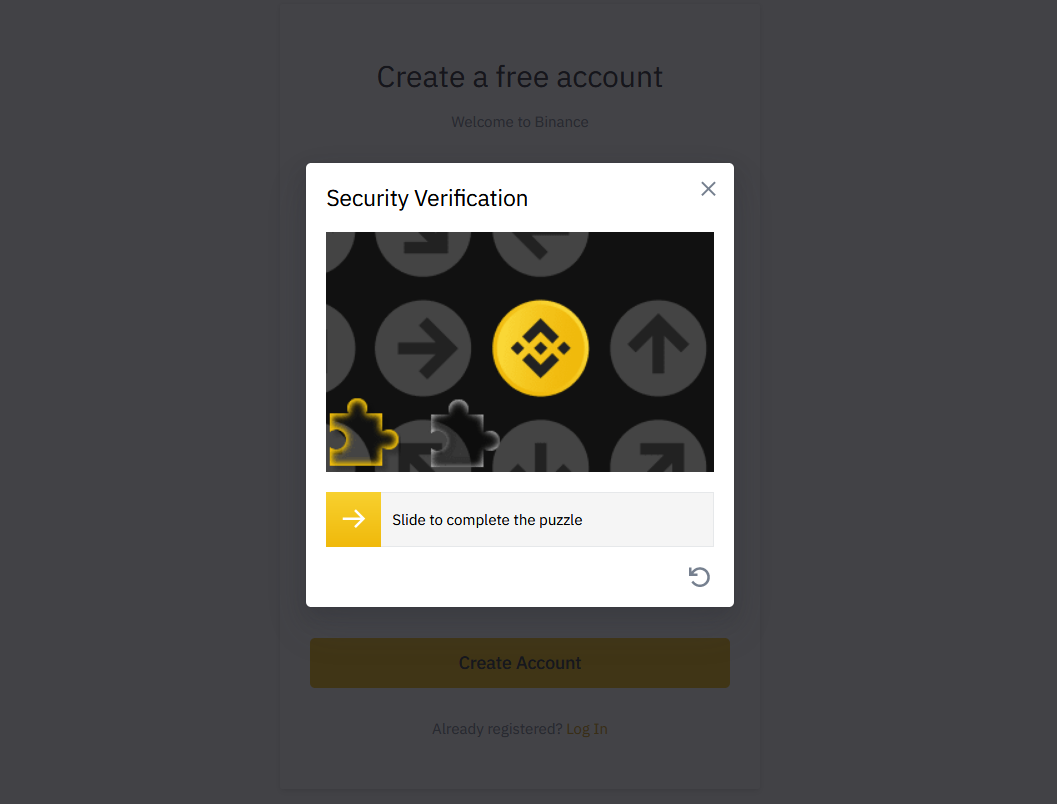
4. Prove that you are not a robot by completing a simple puzzle.
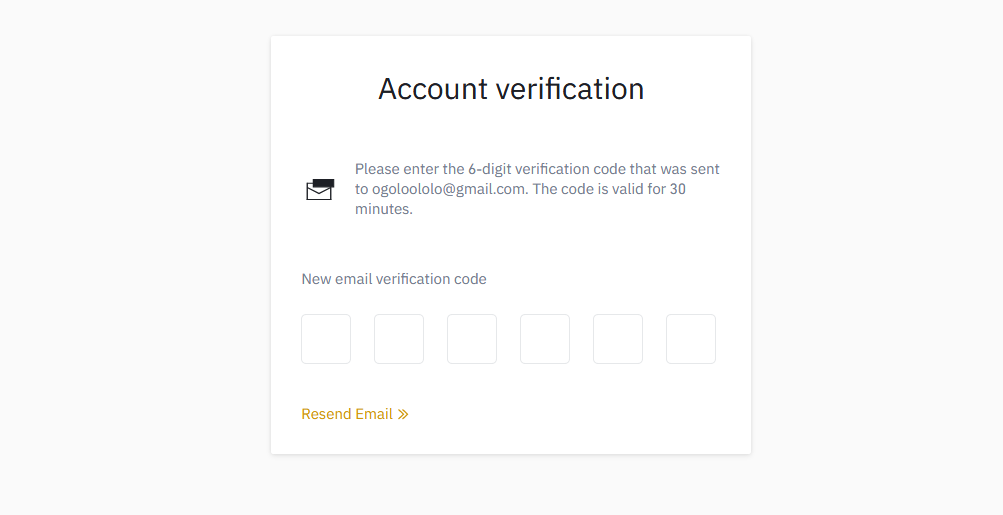
5. Once this is done, an email or text message will be sent to you, depending on the option you choose earlier. Verify your email or mobile number by entering the six-digit code that was sent to you.
Congratulations! You now have your own Binance account.
Pro tips:
- Ensure you use a secure email when creating your new Binance account.
- Your password should be a combination of upper and lowercase letters, numbers, and special characters.
- Use this Binance referral ID W7G64EBZ to enjoy 20% commission money back.
Now that you have created your account, I’ll teach you how to secure it. And this brings me to my next subject.
Is Binance Safe?
Binance has put in place a number of checks to ensure that user funds are safe. You wouldn’t want to wake up one morning and find out that your entire crypto savings have been stolen by hackers. For this reason, Binance stores a large percentage of user funds on cold wallets. So, even if the exchange is breached, your funds might still be secured.
Binance uses mechanisms like blockchain forensics, AI, and security tech to watch over its exchange. Even more interesting is the fact that there is on-point support staff. Depending on the issue, you may be able to get real-time support.
The best part of Binance’s security is its SAFU program. What this essentially means is that your digital assets are insured on the exchange. SAFU stands for “Secure Asset Fund for Users.” It is a one-of-a-kind insurance fund that covers Binance users. The exchange allocates 10% of its trading fee profits to the fund, just in case things go south.
When $40 million was stolen from the exchange, affected users were refunded by SAFU.
As far as security is concerned, Binance is as safe as it can be. On the flip side, you also have a part to play to protect yourself. To buttress this point, in March 2018, Binance suffered a hacking attempt. The hackers were able to gain entry by collecting the login details of users through a phishing website for months. These malicious actors were secretly installing API access on the affected accounts. And this is why you need to protect your Binance account with ogogle authenticator.
How to Setup Binance Google Authenticator?
Beyond your username and password, two-factor authentication or 2FA is another way to keep your Binance account safe. It is an industry-standard and is recommended for every Binance user. In fact, you will be prompted to create a 2FA when you create a new Binance account.
Look at it this way. Your password and username can easily be stolen. This is particularly true if you use the same password for all your online registrations. If one becomes compromised, then you are done for without a 2FA. Moreover, 2FA becomes handy when you forget your password or when Binance suspects a potentially suspicious activity from your account.
Binance has four two-factor authentication options. They include Google authenticator, SMS authentication, security key, and email address.
For the purpose of this guide, I’ll focus only on Binance Google Authenticator.
Follow the steps below to secure your Binance account.
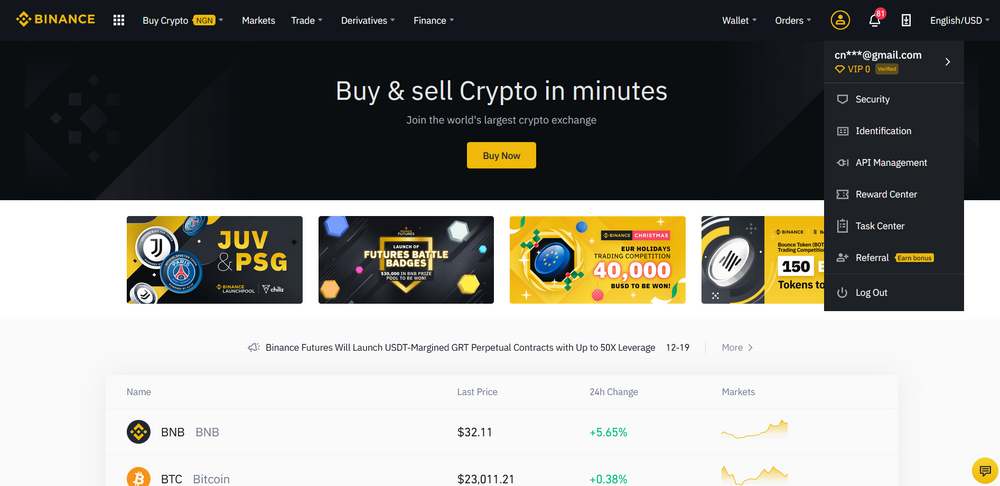
1. Sign in to your Binance account and select “Security” from the dashboard
2. Once you are on the security page, you will find the 2FA section. Click the “On” button to start the Binance Google authentication process.
3. Meanwhile, you will need to download the Google Authenticator app on your mobile phone or PC, depending on your preferred device for verification. Personally, I have a bias for my PC because it is safe and hardly leaves my house. My phone, on the other hand, can be stolen or misplaced.
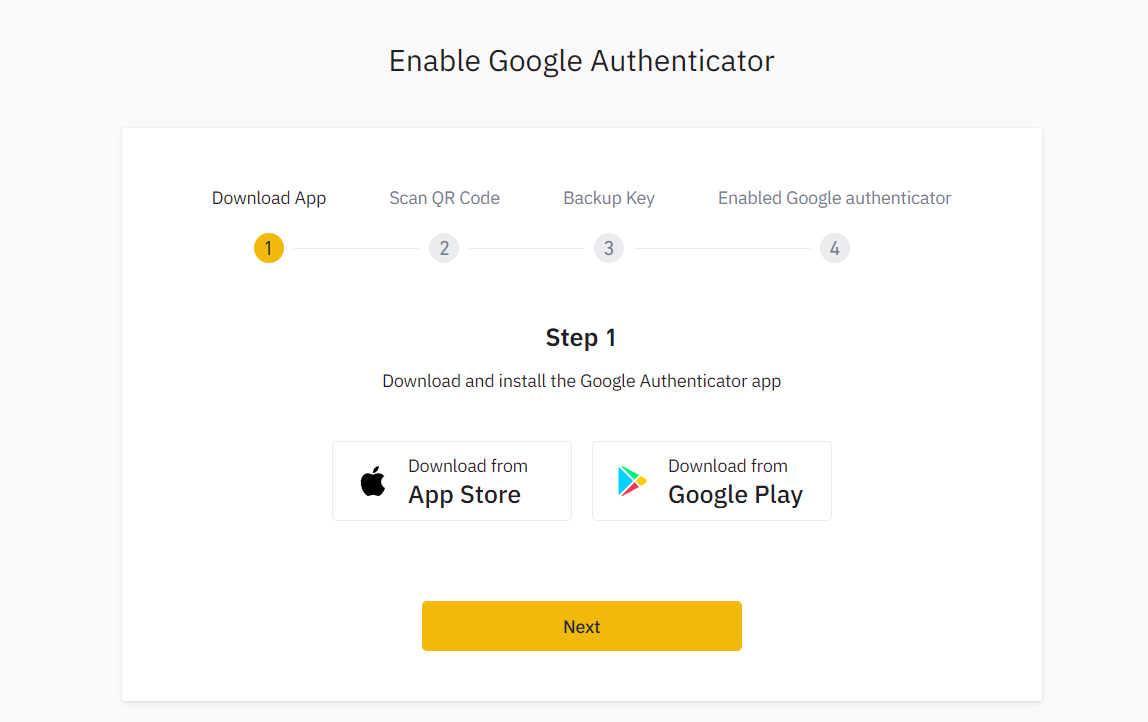
4. Clicking the “On” button in step 2 above will redirect you to a new tab where you can “download and install the Google Authenticator app.” You can download the authenticator for your Android or iOS device. Alternatively, you can download the authenticator extension from the Chrome Web Store.
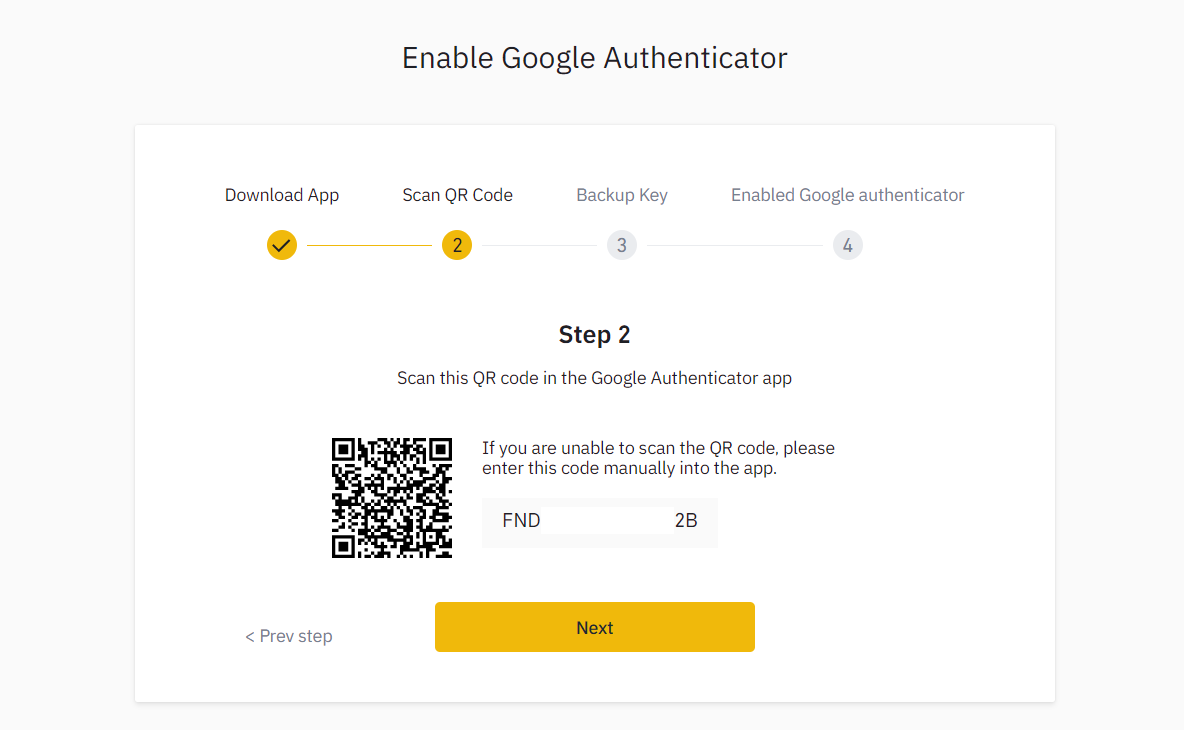
5. If you already have an authenticator, then skip steps 3 and 4. Simply click on “Next”. Scan the QR code provided by Binance or copy and paste the key provided. Ensure you keep this key safe. This is the only way to access your Binance Google authenticator if your device gets stolen or damaged.
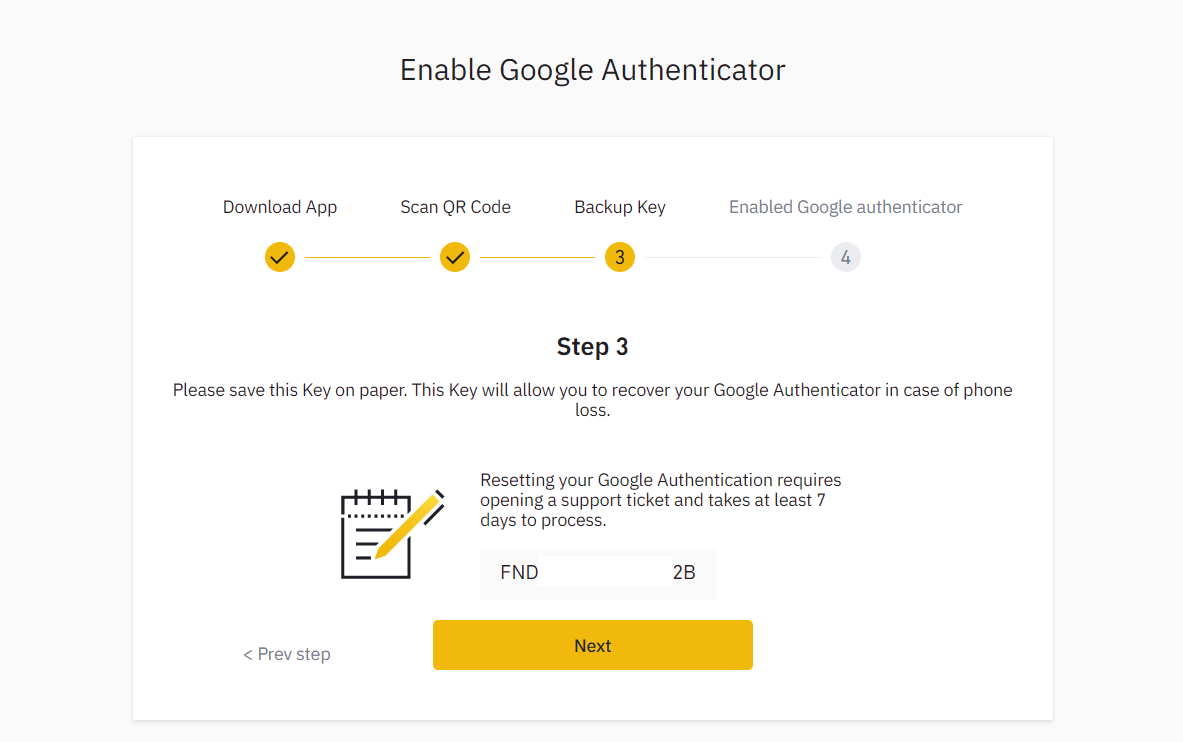
6. With your QR scanned, Binance reminds you to back up your key. I just had to repeat that because it is very important. I lost access to an account in the past because I failed to back up my code.
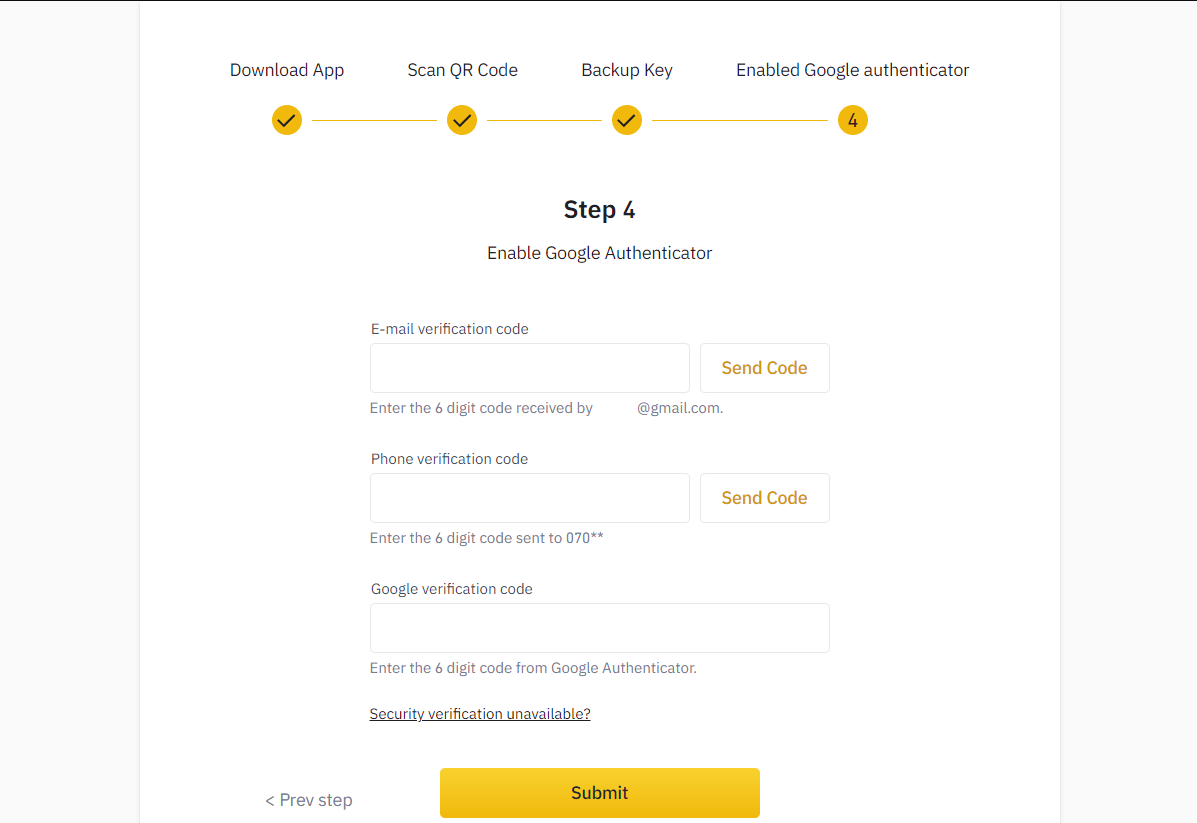
7. Finally, you need to activate your Binance Google Authenticator. Depending on what other 2FA options have been enabled on your account, you will need to provide the 6-digit code that was sent to you via text, email, or your newly created 2FA.
8. Once this is done, hit the “Submit” button.
How to Trade on Binance
After securing your account, I believe it is time to start trading by funding your account. Binance has fiat-on-ramp. This means you can purchase cryptos directly using any of the popular and less-popular fiat currencies like the US Dollar, Yen, Euro, Ghana Cedis, and Nigerian Naira. Once your account is funded, you can start trading. But first, here are a few things that you need to know.
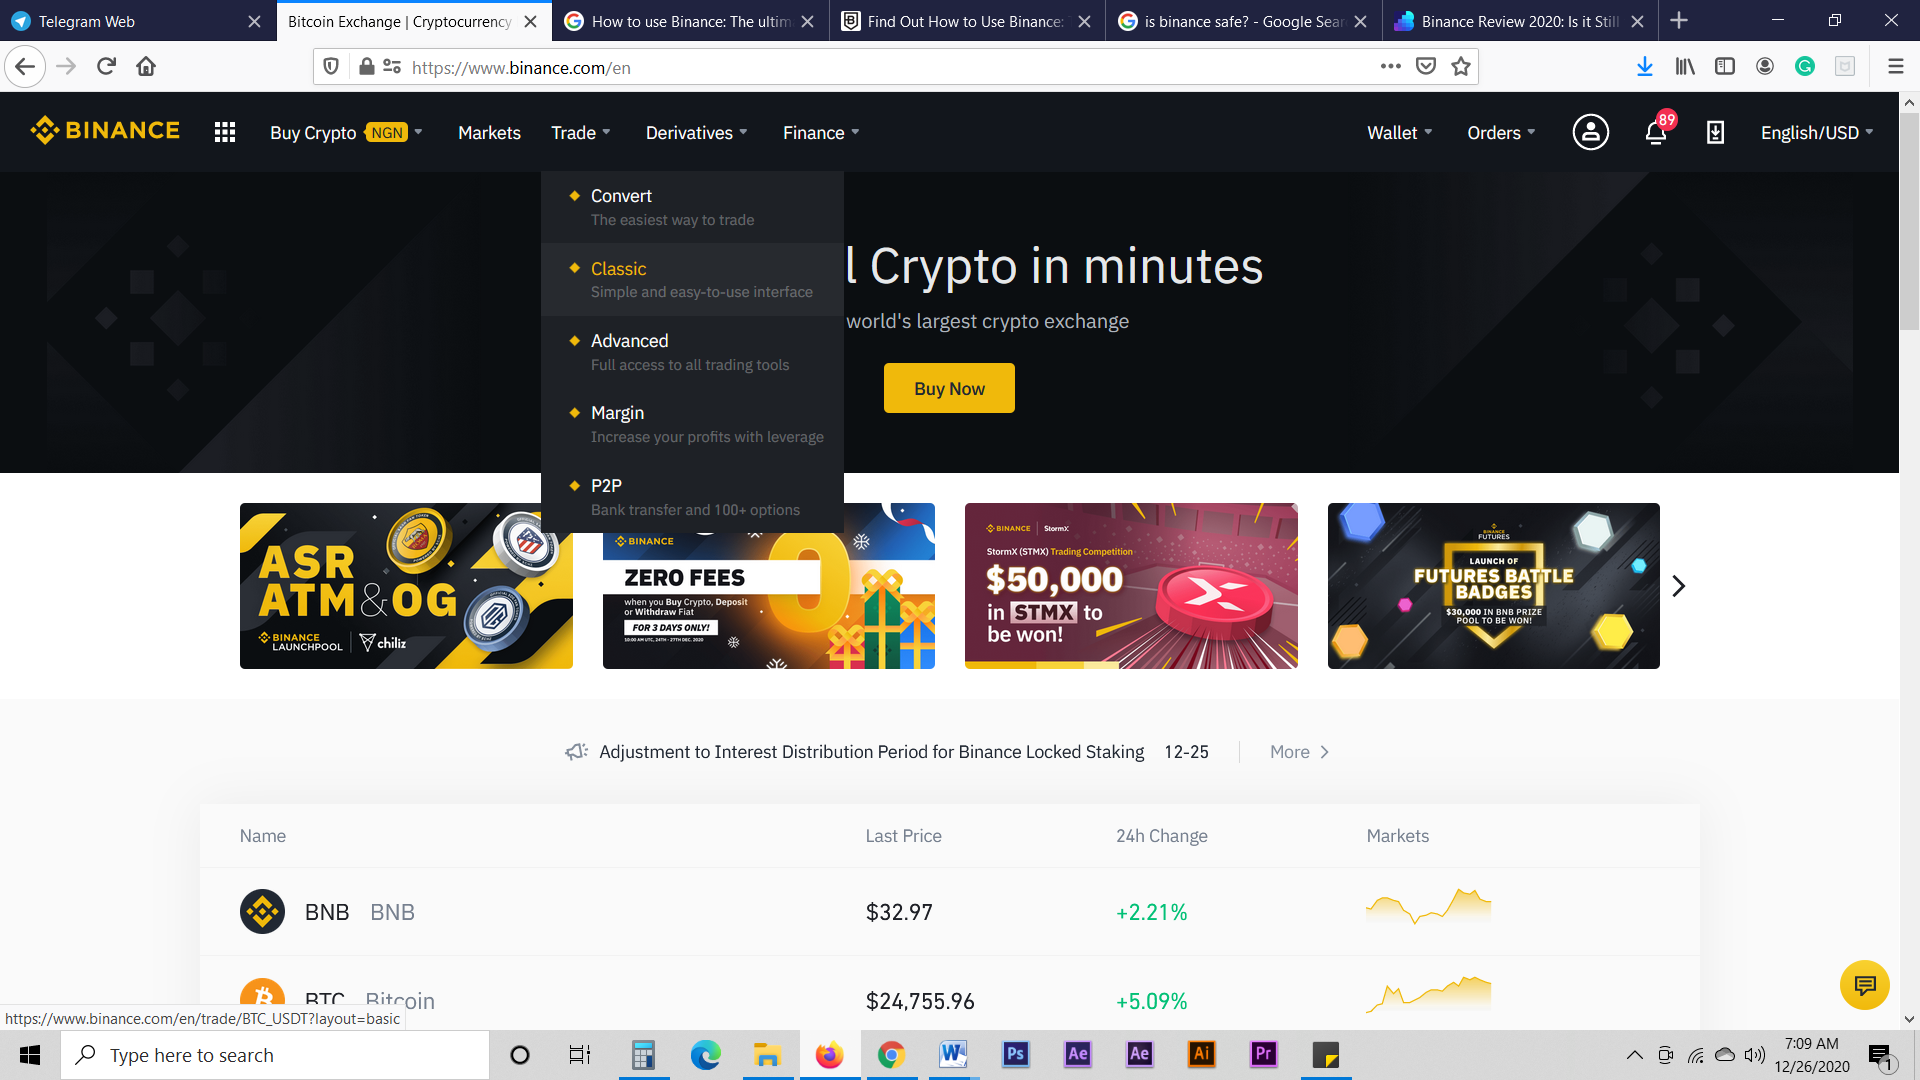
Binance has five trading settings – Convert, Classic, Advanced, Margin, and P2P. Before now, they were only Basic and Advance settings.
Convert as the name suggests is an easy way to exchange or swap your digital asset from one currency to another, without having to deal with market prices. The OTC portal gives you a conversion rate from current market prices. Chances are that you will never use this feature.
Classic, otherwise known as Basic, has a simple layout that is easy to understand. You are presented with only the basic information that you need such as trading pairs, a simple price chart, sell and buy orders, price actions and trading volume over the last 24 hours, and a general overview of the market activity.
The Advanced trade option has all the features of Classic. The only difference is that it prioritizes the charts and data. Since this is a beginner-level tutorial, I’ll skip everything else and focus solely on the Basic trade. Let’s save the other tricks for later.
Complete your first trade by following the steps below:
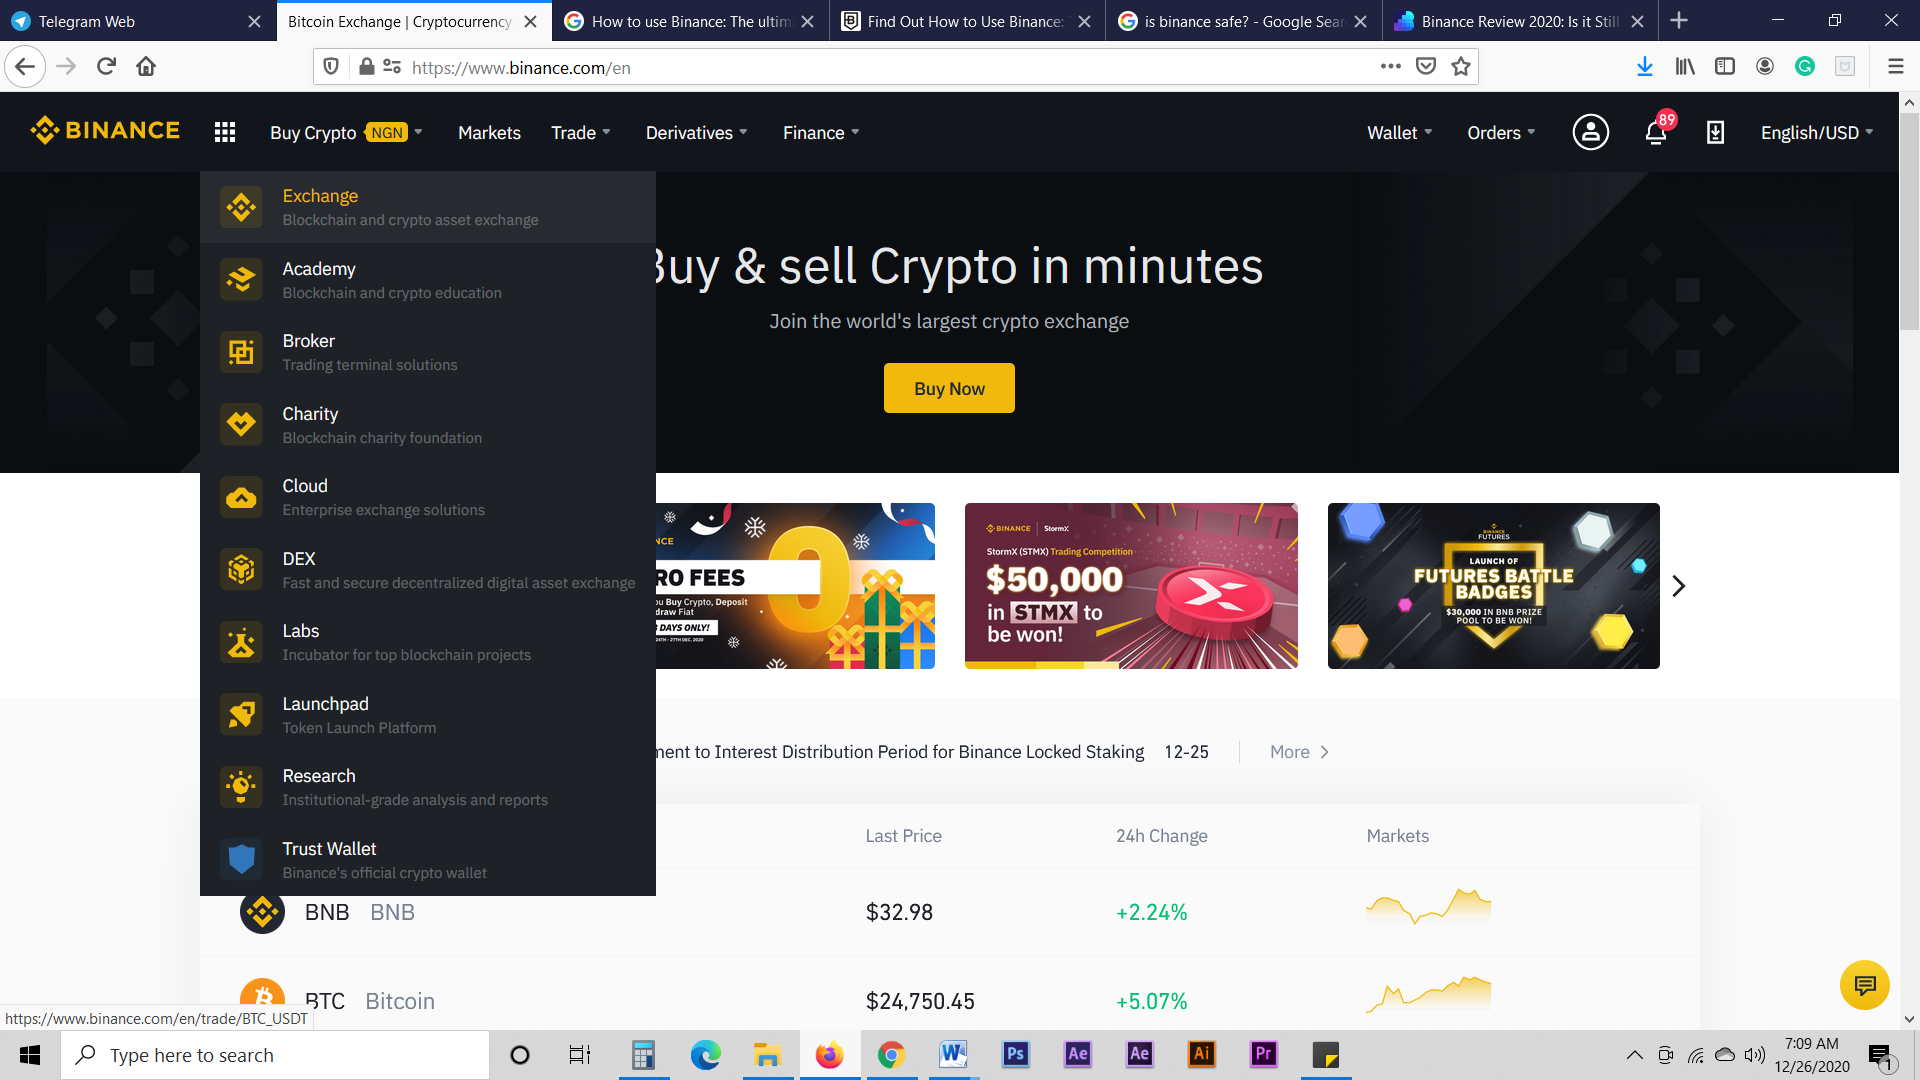
1. Access the “Basic” exchange trade by clicking navigating to “Trade” on the dashboard and then clicking on “Classic”. Alternatively, click on “Exchange” from the dropdown menu. Binance automatically redirects you to the “Classic” trade page.
2. You may be surprised to see that “Basic” isn’t very basic. But not to worry, all the numbers and charts do not really matter (at least not immediately).
On the right-hand side of the screen, you will see a number of trading tabs – BNB, BTC, Alts, and FIAT. This is what you will be trading in. Select your desired currency from the list. There is also a search bar that you can use to easily find your preferred currency. Last but not the least; you can favorite coins by clicking the star next to them. Chances are that you will only trade a few digital assets. Creating a favorite list will help simplify things even further.
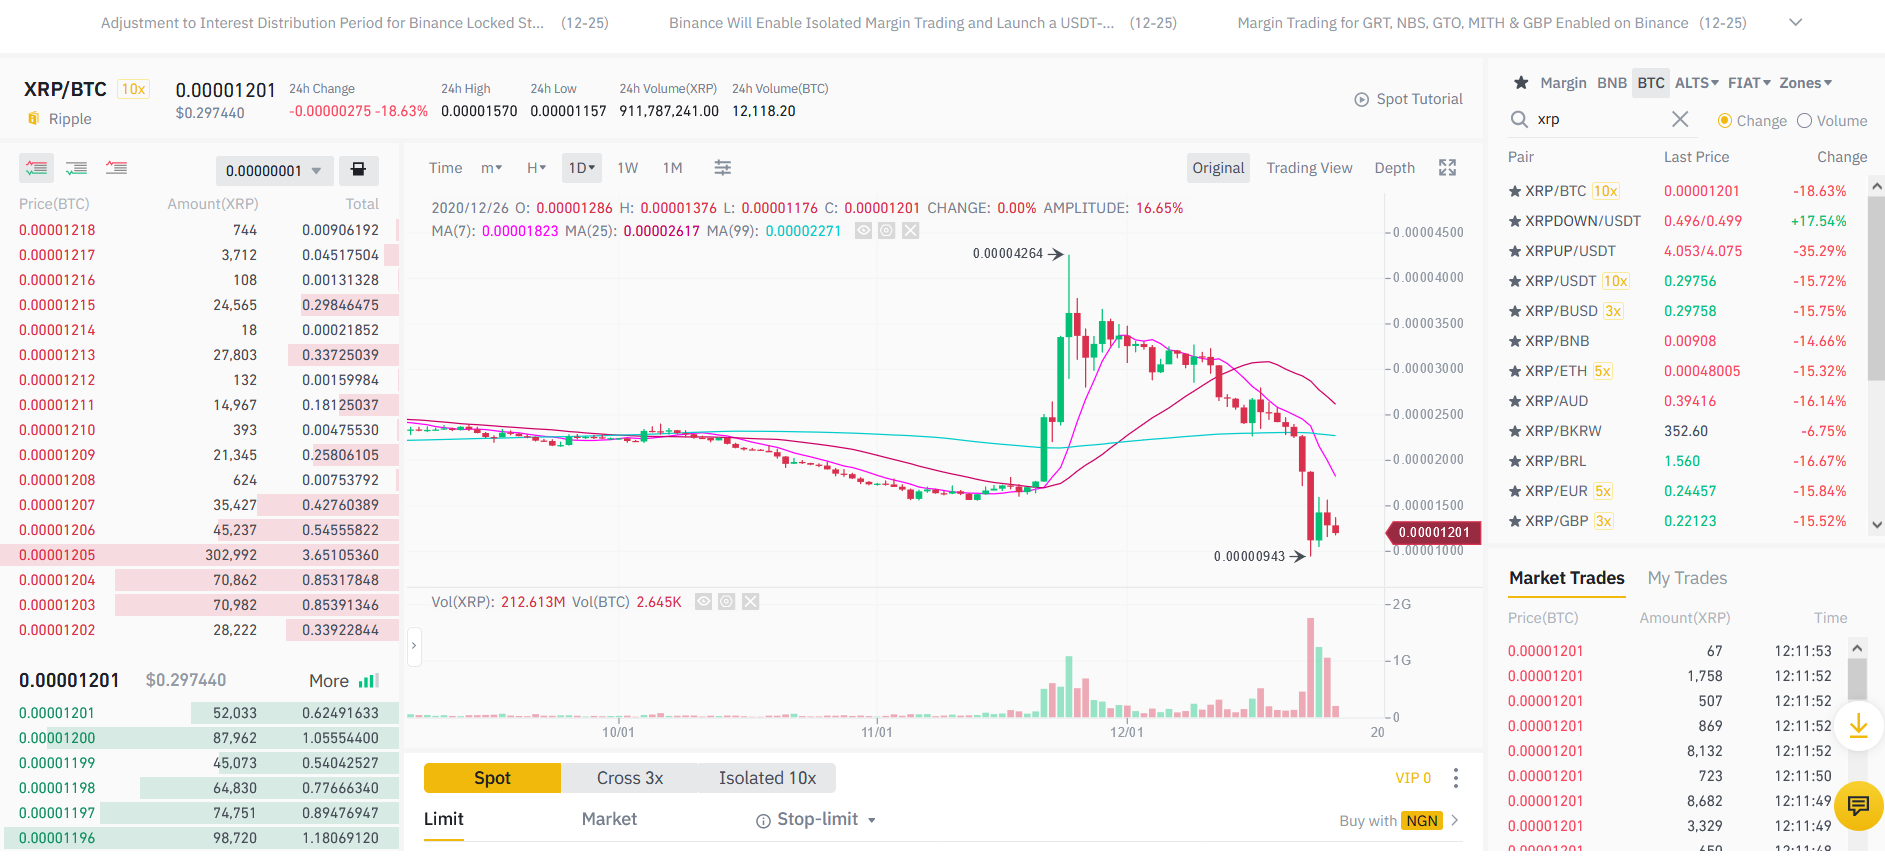
3. Choose a trading pair. As I mentioned earlier, Binance has hundreds of trading pairs. For this example, I have chosen the XRP/BTC pair as seen in the image below. And as you can see from the data, XRP has dropped by over 18% in the last 24 hours.
4. Once you have chosen what you want to trade, select the type of trade you want to make. There are three types of trade on Binance – limit orders, market orders, and stop-limit orders.
In a limit order, you set the maximum price you will like to pay for a particular coin or the minimum price you will like to sell an asset, which in this case is Ripple. Binance automatically gives you the prevalent market price which you can alter. If there is another trader who is willing to sell at that time or lesser, your order will be automatically fulfilled. Otherwise, you will have to wait until a buyer or seller accepts your price.
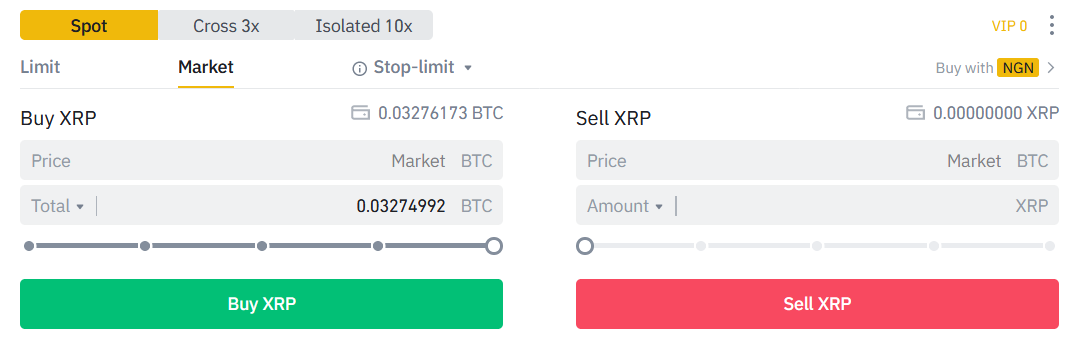
Market orders are the fastest and simplest kinds of trade. If you need to buy XRP immediately at the current market price, select the market order tab.
Binance stop-limit orders allow you to buy or sell a coin once it reaches a certain price. This is usually used by pro-traders.
Since you know what each kind of trade does, it is time to input the amount you want to trade. I recommend you stick with limit and market orders as a beginner.
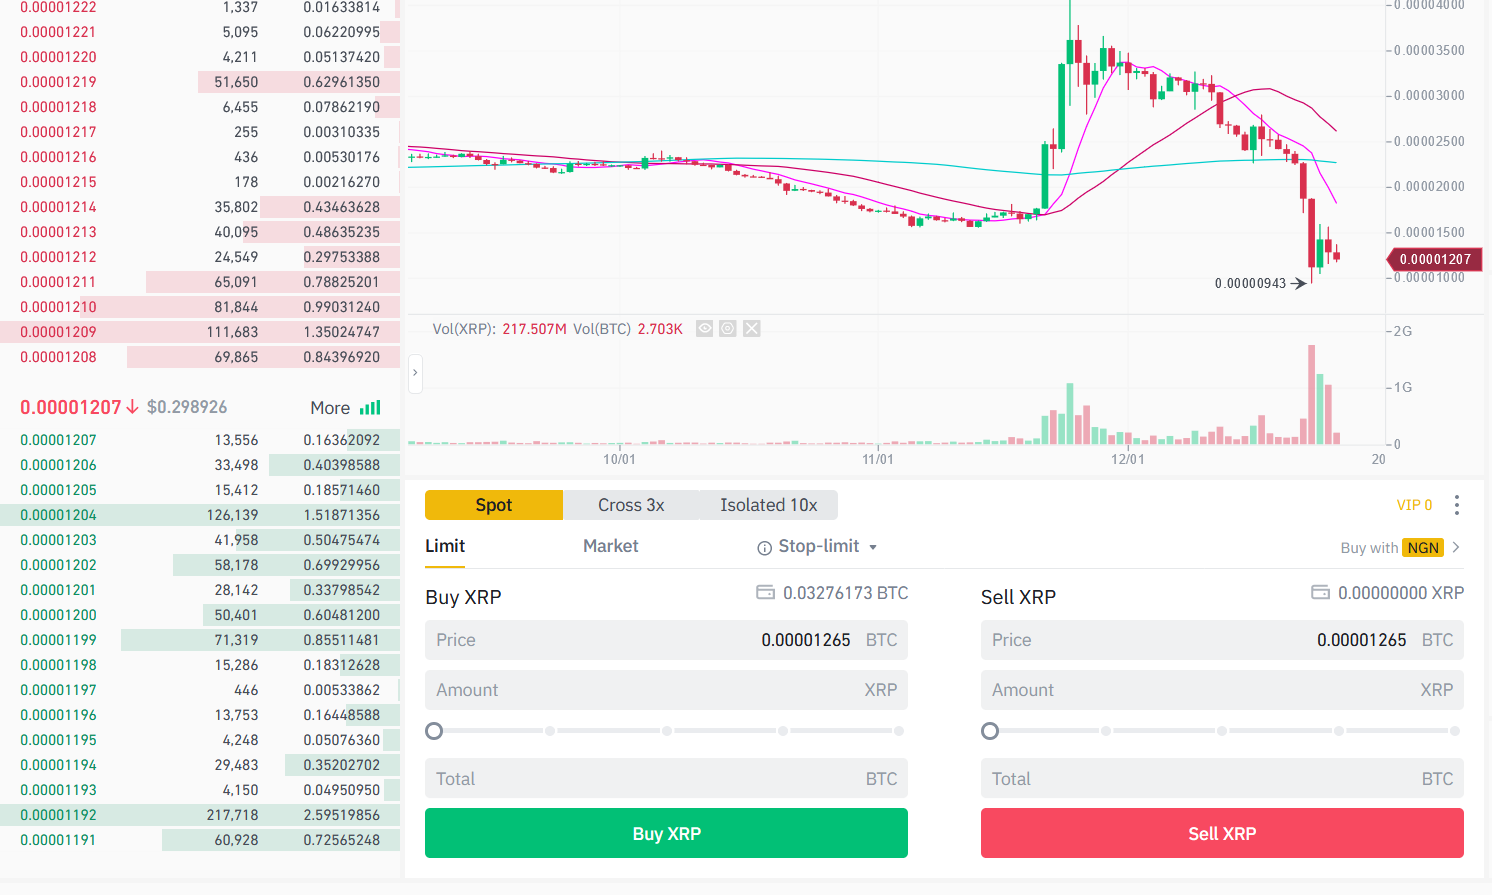
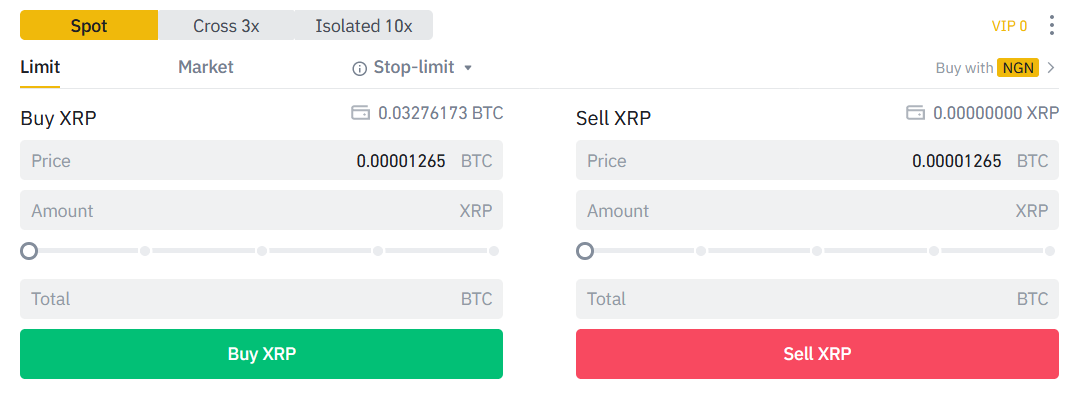
5. For clarity, I will be using a limit order just to show you how it works. Binance has by default given me a price of 0.00001265 BTC for one XRP. However, if you look to the left-hand side, you’ll notice that the current value has dropped to 0.00001207. The crypto market is highly volatile and this value will change rapidly. Now, if you believe that the price of XRP to BTC will drop even further, you can set your buy limit order at say 0.00001190 and then wait. Otherwise, try to mark the changing price and purchase at a reasonable point.
6. Once you are done with step 5, click on “Buy XRP” and that’s it. Your Bitcoin will be traded for XRP.
The reverse is the case for a sell order.
Binance stop limit
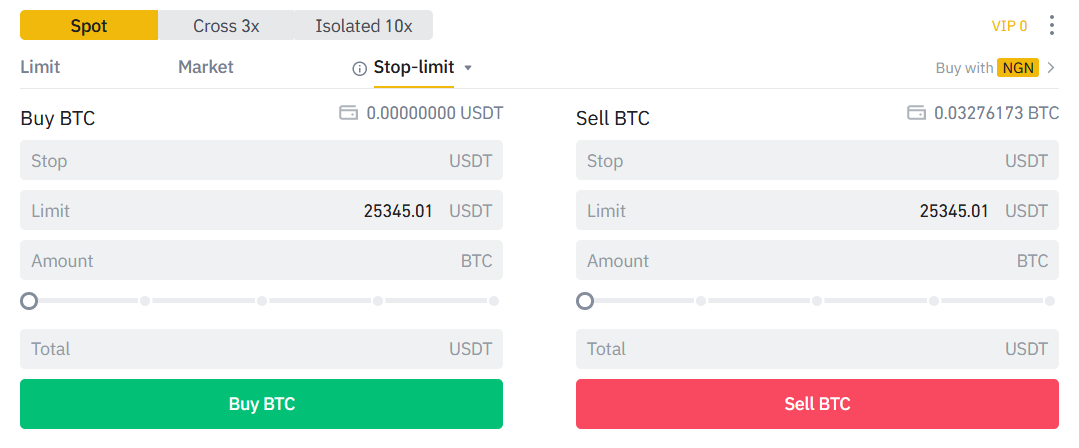
Stop-limit helps you to keep tabs on your losses. A stop-limit is a great risk management tool.
For better understanding, a stop-limit trade can be broken down into parts - the stop price and the limit price. The stop price is the price at which a limit order is triggered. The limit price, on the other hand, is the price of the limit order when triggered. In simpler terms, when your stop price is reached, your limit order will be added to the order book.
As a recommendation, always set your stop price to be slightly lower than the limit price for buys order and slightly higher for sell orders. As a beginner, using stop-limit shouldn't be your initial problem. So, I'll leave out some of the extra details for now.
Binance trading fees
You get to pay a fee for every trade you perform on Binance. However, Binance trading fees are amongst the lowest in the market. Users are not charged for deposits.
As per Binance trading fees, they are capped at 0.1% of each purchase or sale. You can also get up to a 50% discount when you use Binance Coin (BNB) for transactions.
How to withdraw from Binance
To wrap up this guide, I am going to talk briefly about how to withdraw from Binance. Let’s say you’ve finally doubled or tripled your investment and you want to finally cash out. Or you got a hard wallet and want to transfer your funds into cold storage. Follow the steps below to withdraw your funds from Binance.
1. Move your mouse over to “Wallet” on the dashboard then click on “Fiat and Spot”
2. The next page shows you the list of assets you currently hold. Select the crypto or fiat that you want to withdraw.
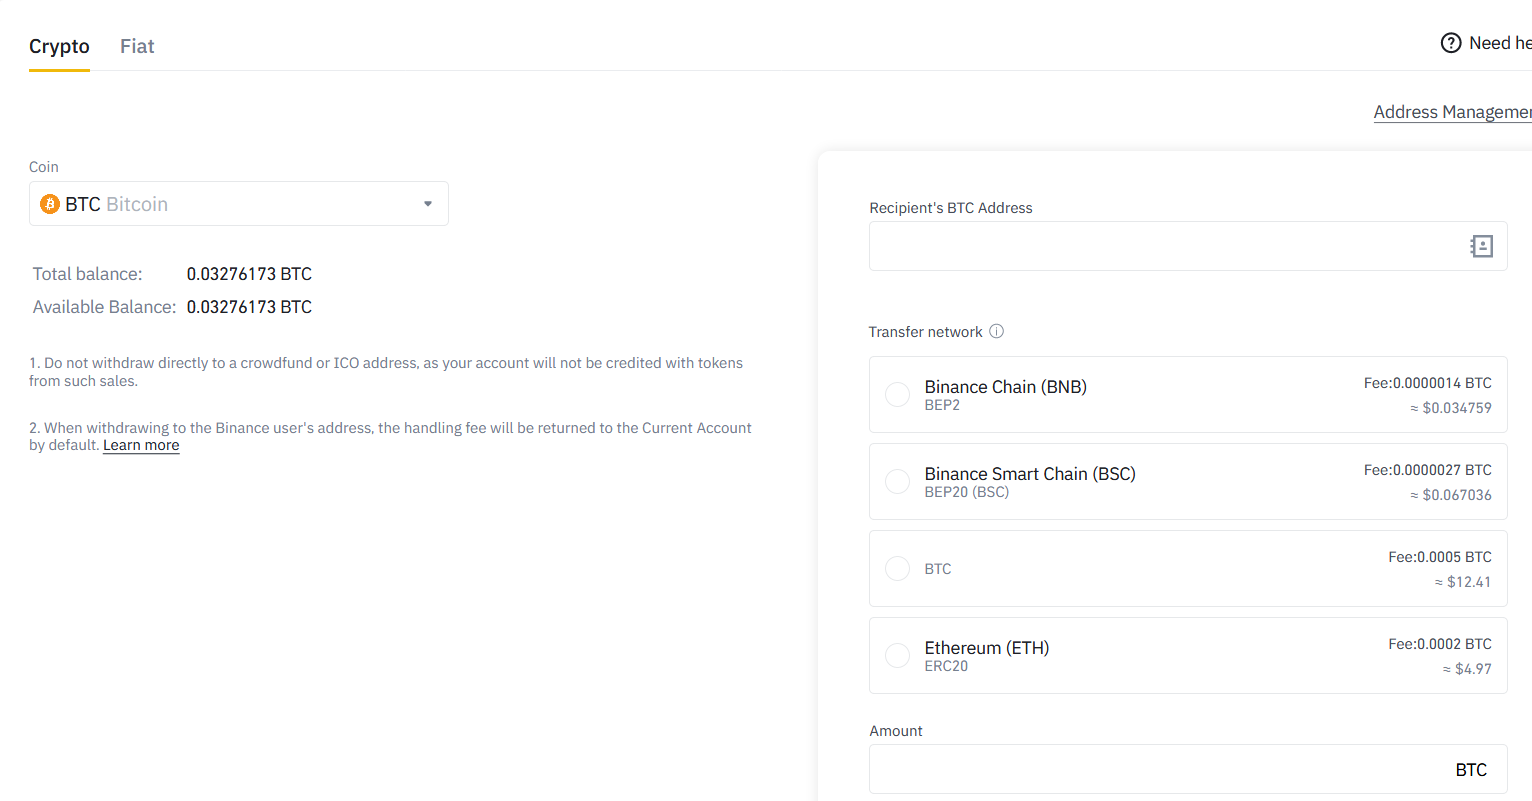
3. If it is crypto, enter the recipient’s wallet address and then click on Submit. Be careful not to make any mistakes here. In the case of fiat, enter the amount and appropriate details and then submit.
Binance withdrawal fees
When it comes to withdrawing from Binance, there is no fixed fee. The exchange charges different withdrawal fees for different cryptocurrencies. For example, a withdrawal in Ripple will cost 0.25 XRP; whereas the fee for Ethereum is 0.01 ETH. So far, I think withdrawals in BTC are the most expensive on the exchange.
Binance Launchpad
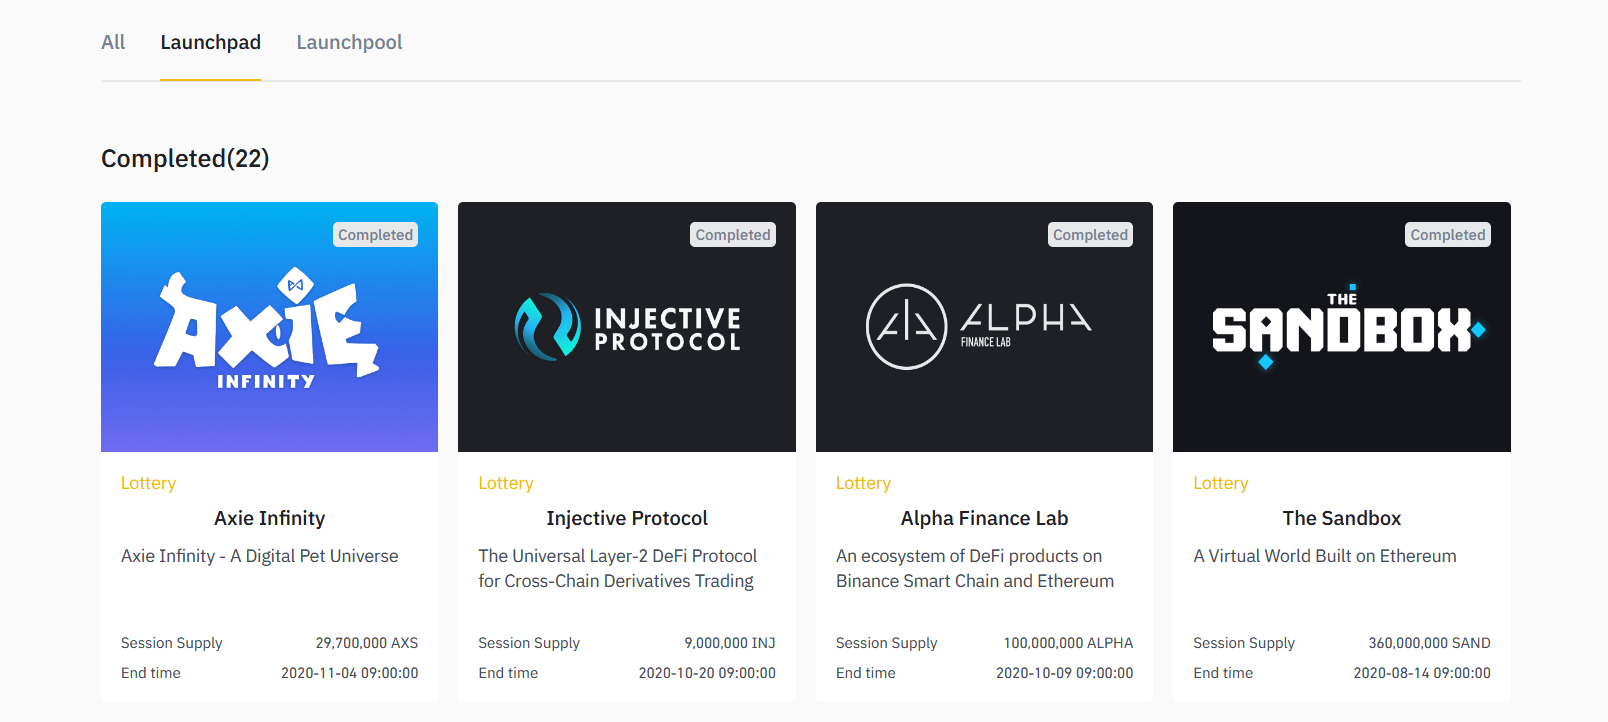
Apart from trading cryptocurrencies, another potential way to make money on Binance is by buying promising projects early. Take Bitcoin and other altcoins as case studies. The idea here is to buy tokens when the price is still low and then resell after it launches. This is made possible via Binance Launchpad
Binance Launchpad is a token launch platform for promising projects. On one hand, blockchain projects get to raise funds and increase their reach. On the other, Binance users get the chance to be part of "a potentially game-chainging project."
Binance vs Coinbase
Beyond the Binance vs. Coinbase dilemma, there a several factors to considers when choosing an exchange (most of which I will cover in the remaining sections of this guide). Generally, you will need to look at the fees, fiat options, and the number of supported coins, security, margin trading, and regulatory compliance, amongst others.
In many regards, Binance and Coinbase can go head-to-head. Both exchanges are very popular and available to the US market.
To date, Coinbase has raised approximately $550 million from several high-profile investors, including Tiger Global Management and Andreessen Horowitz. Coinbase was also the first crypto company to be valued at more than $1 billion.
While Coinbase restricts exchange trading to the Coinbase Pro brand (formerly known as GDAX), Binance offers its services internationally with a separate brand for US customers. Coinbase was founded in the US and is largely compliant with US regulations. For this reason, its KYC and AML policies are among the strictest in the exchange market.
Comparing KYC Requirements on Binance and Coinbase
As you should already suspect, Coinbase has stricter KYC procedures. With a basic level verification on Binance, you can withdraw up to $5,000 daily. A basic level verification on Binance requires details such as your name, date of birth, address, and gender, with the addition of social security number for US residents. This level of verification is usually approved almost instantaneously and will allow you to start buying and selling cryptocurrencies. Advanced verification, on the other hand, requires the same details as the basic verification in addition to extra information such as ID (driver’s license, passport, or green card) and proof of address (utility bill or bank statement). While Binance’s advance verification takes a few hours before it is approved, it allows users to withdraw up to $1 million per day.
Coinbase Pro does not have anything like basic-level verification. All users must pass through the full verification process before they can use the exchange. This generally involves information such as your name, date of birth, address, source of funds, social security number, explanation of activity, and employment information. Moreover, you also need to take a selfie and upload a photo of your ID. The threshold for Coinbase Pro account holders is $25,000 per day.
Comparing Supported Coins on Binance vs Coinbase
Binance does not hold the reputation of the world’s largest exchange for nothing. While Binance US offers trading for about 41 different coins across USD, stablecoins, and BTC pairs, its international counterpart boasts of over 200 different coins across a plethora of pairs. Coinbase Pro, on the other hand, offers 29 different coins across USD, USDc stablecoin, and BTC pairs.
Comparing Binance vs Coinbase fees
Both exchanges have a tiered fee structure that is dependent on a user’s trade volume over a trailing period of 30 days. Binance charges a 0.1% maker and taker fee for spot trading for accounts that have traded less than $50,000 over the trailing period. Meanwhile, Coinbase Pro charges a 0.5% maker fee and a 0.5% taker fee for accounts with less than $10,000 in trading volume over a 30-day period.